


Overview
While playing with friends on your Minecraft server, some may want to form groups to continue their adventure. This allows the party of users to have better success at collecting resources, battling monsters, and building bases. By default, Minecraft doesn’t allow for this type of feature and forces everyone to group up by word of mouth instead. If you’re wanting an official system for players to create these parties in-game, then consider the Clans plugin. This allows you and others alike to make a clan, notifying all users in the server’s chat whenever you send a message. There’s even a teleportation feature to share a base with your clan members, among custom addons to add extra features. These include a community chest, private group chats, and many more. Setting it up is quickly done on our panel, but may be confusing for newcomers to the hosting scene. Due to this, we’ve created this Apex Hosting guide to show you how to install and use the Clans plugin on your Minecraft server.
How to Download
- Navigate to the Clans page on Spigot’s website.
- Continue to click the
Download Nowbutton at the top right corner.
- Save this file somewhere easily accessible on your computer.
At the time of writing this, the Clans plugin hasn’t been updated since 2020 and only has been tested on Minecraft 1.16. However, we’ve confirmed that this works for 1.19 and shouldn’t be problematic. If you experience any issues, then consider downgrading to 1.16 or use another build of Clans. Additionally, if you’re planning to install official addons for this plugin, then keep in mind that issues may arise due to their outdated versions.
Server Installation
Before trying out Clans on your Minecraft server, you’ll need to install Spigot, Paper, Purpur, or another similar type to support plugins. This can be done by selecting either of them from the Game File area in the main panel, then restarting to generate its required files. Once you’ve done this, follow along below to install the plugin on your server.
- Head towards your Apex server panel and click
FTP File Accessnear the top left.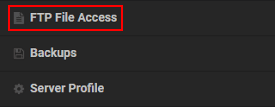
- Use your
Passwordin the text box, then press theLoginbutton to gain access.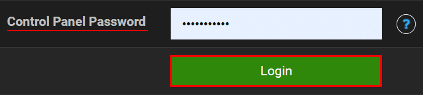
- Afterwards, locate and enter the plugins directory from the list.
- Once there, press
Uploadat the top left and drag the Clans file in the respective area.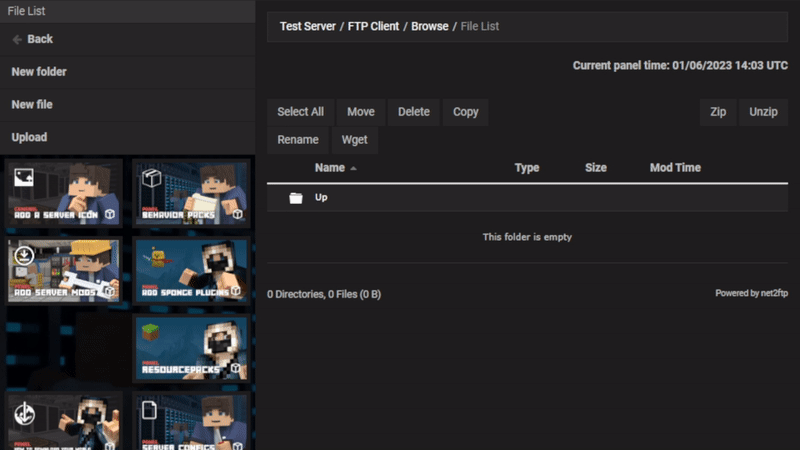
- Wait for this to reach
100%, then return to the main panel andRestartthe server.
Getting Started

After joining the server, you should have immediate access to Clans and its features. This is due to the plugin’s design, as by default no permissions are enabled. However, you can toggle this in the configuration along with other settings. We’ll discuss this later on, but for now you can begin creating clans and inviting friends. Remember, you can even have a base to share with all your members. There’s even a unique chat format, but can also be tweaked to your liking, even being implemented into other plugins that manage this aspect with placeholders. Almost everything from Clans can be edited and tailored to your server, so review the subsections below to learn all about this setup to get started.
Creating a Clan
While in your Minecraft server, try running the /clan create [name] command in the chat. This should allow you to make a group for others to join, which is confirmed by a return message. Doing this is the first step towards using the plugin, as very few features are allowed without clans. By default, there’s only 5 characters allowed for the name of your party. This can be tweaked to anything you want, even allowing unique colors if configured properly. Besides this, everything you and others need is ready from the get-go.


After creating a clan, you may notice a new chat format when sending messages to others. This depends on your current server’s setup though, as it may appear differently if you have a standalone plugin to manage this aspect.
Using placeholders in your configuration will help you make changes, but those without any previous custom format can simply edit the Clans settings to accomplish the same task.
Clan Management
As for managing your newly-created clan, there are a few features to keep in mind. These include inviting and kicking members, plus viewing the group’s statistics. This plugin keeps track of the total kills by everyone and sorts them in a list from every clan. Using this is perfect for KitPVP or other combat-related servers, especially if your playerbase is competitive. We’ll break down the basics of clan management for you to easily control players in your party.
Members
Inviting members to your clan requires the /clan invite [user] command. Once you do this, the player cannot be uninvited.

This means you should only send this invitation to those you trust. When someone receives one, they can run /clan accept in the chat to join the group. Keep in mind that anyone can leave your clan, as it only requires the /clan leave command.

Another way to leave the group is being kicked by the leader, which is done with /clan kick [user] in chat.
Whether you mistakenly invited someone else or simply want a player out of the party, this command comes in handy.
Stats
Instead of managing your members, you can view stats of your own clan. This provides you with all members and total kills by everyone, which is done with the /clan stats [name] command. Alternatively, you can view the top ten groups by only using /clan stats in chat.

This acts as a leaderboard, which can technically be implemented into holograms or other areas in your server with the right plugins/configuration. Keep in mind that you can customize the appearance of these clan statistics if you’re unsatisfied with them.
Bases for Clans
One of the most exciting features from this plugin is the ability to share bases with clan members. This acts like setting homes with other Minecraft plugins, but is only for your group. Whether you only have two or many other players in the clan, they all have access to this feature. Teleporting to your base requires you to first use /clan setbase at your desired location, then you can run /clan base to teleport back to it. There’ll be a 5 second delay for the teleportation, but can be lowered in the plugin’s configuration.
Plugin Configuration
There’s a few files that you can access with the FTP panel to begin editing, such as config.yml and messages.yml. However, others include all the clans in the server for you to alter in any way. This comes in handy if you’re wanting to completely remove a group or simply making manual changes. Besides this, the main configuration file contains the permissions and general settings for the Clans plugin. With this in mind, review the steps below to make any desired changes.
- Navigate towards the
FTP File Accessarea and login with your credentials accordingly. - Continue to enter the following directory:
…/plugins/Clans/Settings
- Once there, press
Editon the right for the config.yml file to reveal its contents.
- Make any necessary changes, then click
Saveat the top.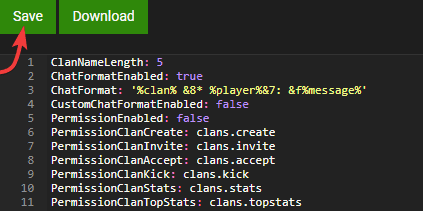
- Return to the main panel and
Restartthe server to apply these edits.
Commands & Permissions
If you’re wanting to completely control how players use Clans on your Minecraft server, then you’ll need a permission management plugin. An extremely popular one is known as LuckPerms, but there are others if you want. Remember, this requires you to first enable the permissions in the main configuration file. After doing this, you may review the table below and start assigning them to users or groups.
| Command | Permission | Description |
|---|---|---|
| /clan create [name] | clans.create | Ability to create clans in the server. |
| /clan delete | clans.delete | Ability to delete clans in the server. |
| /clan invite [user] | clans.invite | Sends the targeted player an invitation to your clan. |
| /clan accept | clans.accept | Once a player receives an invite, they may join with this command. |
| /clan kick | clans.kick | The ability to forcibly remove a member from the clan. |
| /clan stats [name] | clans.stats | Shows the clan’s statistics in chat. |
| /clan stats | clans.topstats | Shows the top ten clans in the server. |
| /clan setbase | clans.setbase | Ability to set your location as a base for others to teleport. |
| /clan base | clans.base | The command for teleporting to existing bases. |
| /clan leave | clans.leave | Ability to leave a clan on the server. |
| /clan list | clans.list | Lists all the clans in chat. |
| /clan reload | clans.reload | Reload the entire plugin to apply recently changed config files. |
Custom Addons
Sometimes, players may want more abilities and features for their clan. This motivated the developer of Clans to create several official addons for the main plugin. For example, you can install Rename to allow leaders to change their group’s name. Another one called Chest allows clan members to share items in a double chest GUI via a command. Other addons are available on the Clans Spigot page, near the bottom for you to review.
Common Issues
In some cases, you or others may be unable to make clans on the server. This can happen for several reasons, such as the plugin being incompatible with the Minecraft version you selected. Remember, this hasn’t been updated in a long time as of writing this guide. Only 1.16 has been officially tested, but 1.19 should work fine without issues. If newer versions or older ones aren’t working properly for you, then consider switching to compatible types. Alternatively, you may have accidentally installed Clans in the wrong Server Profile. Make sure its file is uploaded in the plugins folder on the FTP panel for the right profile so everything functions normally.
If you’ve installed an addon for Clans and it won’t work, it may be incompatible with your Minecraft version on the server. This is similar to the above issue, but isn’t easily resolved due to addons having different designs. In this situation, your best bet is to try other builds of it or simply remove it from the FTP panel. Otherwise, you may have to add the addon’s permissions to your account or group in LuckPerms or another plugin, if this feature is enabled in the Clans config file.
Remember, you must enable permissions in the config.yml file of the …/Clans/Settings directory via the FTP panel. The exact setting is PermissionEnabled and must be formatted properly when making changes. For example, you have to change “false” to “true” in the file so everything works. This means no extra capitalization or removing required spacing in the editor. After doing this, all permission nodes should work as intended if configured correctly in your managing plugin.
Useful Links
Clans on Spigot
How to Add Plugins to a Minecraft Server
Connecting and Using the FTP Panel
Installing and Using LuckPerms in Minecraft


