Overview
While vanilla Minecraft can be a lot of fun on its own, adding mods is one of the best ways to reshape gameplay, from new items and mechanics to entirely new dimensions. Getting those mods running takes more than pasting a few files into a folder, though. Every Minecraft mod depends on a mod loader to bridge the game and the mod code, and as of 2026 there are three loaders in common use: Forge, Fabric, and NeoForge. Which one you need depends on the mods and modpacks you are trying to run, since files built for one loader generally will not work on another without a separate compatibility mod.
This guide is the deep dive for Forge specifically: still the most widely supported option for many long-running modpacks, and one of the two loaders (alongside Fabric) that most client mods are built for. Whether you want to team up with friends on a server or explore alone in singleplayer, mods need to be installed on your own computer first, which means understanding both the mod loader and the launcher you are using. This walkthrough covers downloading mods from CurseForge, installing Forge, and adding mods through both the vanilla Minecraft launcher and the CurseForge launcher.
Forge vs Fabric vs NeoForge: Which Should You Use?
Minecraft’s modding scene runs on three main loaders, and picking the right one depends on what you are trying to play. Forge has been around the longest and has historically carried the largest back catalog of mods and modpacks, which is why so many established Forge-based packs and servers are still running it. Fabric is a lighter-weight loader that became popular for performance-focused mods and tends to pick up support for new Minecraft versions quickly, making it a common choice for newer content mods. NeoForge is a community-maintained fork of Forge that has become the default loader for many new content and tech modpacks on Minecraft 1.20.5 and 1.21 and later.
If you already have a Forge-based modpack, a mod that is only available for Forge, or a server whose requirements specify Forge, this guide walks through the full installation process. If you are starting fresh and would rather use a lighter loader instead, our guide to the Fabric mod loader covers what it offers, and our walkthrough on installing Fabric instead has the step-by-step process.
Downloading Mods
- Visit the CurseForge mods list, then browse and click the desired mod page.
- At the top of the webpage, press the “
Files” button, then scroll down to click “View All“.
- Locate the version you wish to use, then press the “
Download” button to the far-right.
- Save the file to a safe location, as it will be needed shortly.
Dependency Mods
Some mods will require other mods to be installed in order to function. These are often listed within the mod description or can be found under the “Relations” tab at the top of the page. If a dependency is listed, download the matching version like before.

Vanilla Launcher Installation
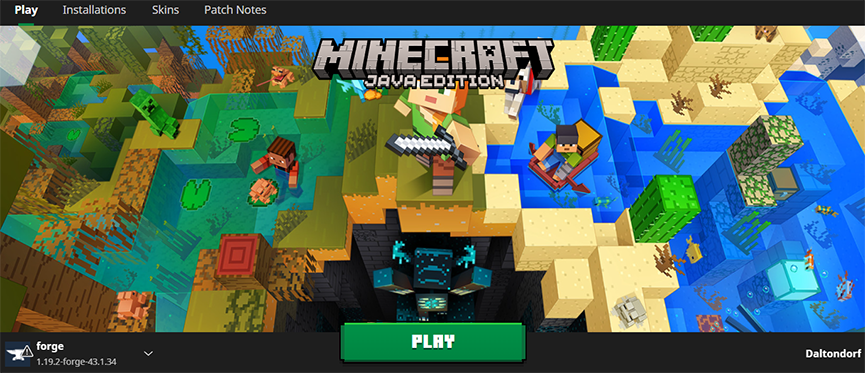
By default, the Vanilla Minecraft launcher is not able to run any mods. This is achieved by installing Minecraft Forge to your client. For a full guide on installing Forge client-side, visit our tutorial on installing Forge client-side.
Installing Minecraft Forge
- Navigate to the Minecraft Forge download page.
- Within the left-hand menu, select the version you require.
- Select either Installer from either the “
Latest” or “Recommended” release.
- Save and run the downloaded Forge .jar file.
- Check that the information looks correct, then press “
Ok” to install.
- Once installed, return to the Minecraft launcher and ensure your Forge version is available.
Note: If you cannot find your Forge profile, visit the “Installations” tab in the launcher, then ensure the “Modded” box has been checked.
Adding Mods
- From the Minecraft launcher, enter the “
Installations” tab at the top. - Hover over your Forge installation, then press the “
Open Folder” icon to the right.
- In the new window, locate or create the
modsfolder, then enter it. - Paste the mod .jar file(s) from earlier into this location.

- Once done, return to the MC launcher and press “
Play“.
Once your mods launch successfully in singleplayer, you may want to play with others. Client-side mods alone will not let you join a multiplayer world; you also need a server running the same mod list. If that is the next step for you, our guide to setting up a modded Minecraft server walks through the process, and Apex’s modded Minecraft server hosting is built with Forge, Fabric, and NeoForge modpacks in mind.
CurseForge Launcher Installation
Creating a Custom Profile
- Download and install the CurseForge launcher from their website.
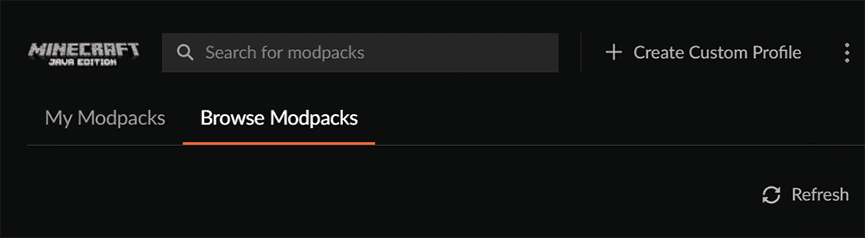
- Once opened, press the “
Create Custom Profile” button at the top.
- Here, you can customize the name and Minecraft version of the profile.
- If you require a specific Forge version, use the applicable dropdown menu.
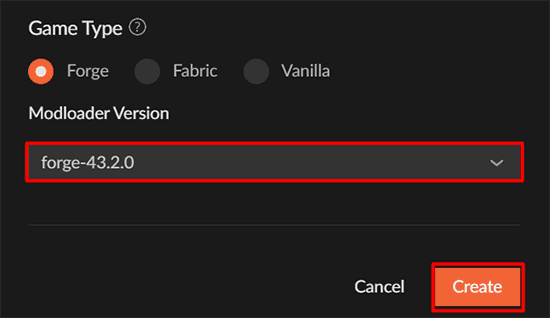
- Finally, press “
Create” to automatically install Forge to this new profile.
Installing Mods Manually
- From the CurseForge app, right-click your newly-created Custom Profile.
- Click the “
Open Folder” button and enter the opened window.
- Locate and enter the
modsfolder, then paste the mod file(s) here. - Once complete, return to CurseForge and press “
Play” on your custom profile.
Note: This method can also be used to install mod files on existing modpacks in order to add more features.
Installing Mods Automatically
Instead of manually installing mods on the CurseForge launcher, you can also install them directly from the app. Keep in mind that not all mods are available through this method.
- Within the CurseForge application, click on your Custom Profile.
- Under the “
Installed Mods” section, press “Add More Content“.
- On the next page, browse for the desired mod, then click “
Install“.
- CurseForge will automatically download the necessary files for your mod to run.
- Once completed, click “
Play” to load up your mod files.
Alternative Launchers

While this tutorial covers the two most commonly-used launchers, these instructions should function on any Minecraft launcher that allows you to run Forge-based versions, including modpacks (see our guide on adding mods to an existing modpack). Prism Launcher, a widely used fork descended from the older MultiMC project, and the Modrinth App are also common choices as of 2026, and both handle Forge instances the same way, through a mods folder tied to each instance. Regardless of the launcher, the process is the same, requiring you to access the mods folder and add your .jar files.
If you would rather skip installing mods one by one, installing a pre-built modpack bundles a curated mod list together automatically instead.
Common Issues
There are many reasons for this, but this issue often occurs when there is an issue with one of the mod files. Ensure that all mods and Forge are running the same game version, as well as confirm that any dependency mods are installed. If issues persist, check the error message to see if any additional information is provided. Once this is completed, return to the launcher and restart the game.
When this error is received, it generally means that the server is running mods that are not installed on your client or vice-versa. Check that all installed mods on the server are also on your own game. To check that the mods are working correctly, enter the “Mods” tab from the main menu. After the mod files match, restart the game and attempt to join once again.
If this error appears, it often means that you are attempting to join the server from a vanilla version. You can confirm this by checking if the “Mods” tab from the main menu appears. If not, return to your launcher and make sure you are only launching from your Forge installation. After everything loads correctly, try to join the server again.
Helpful Links
- Modded Minecraft Server Hosting
- CurseForge Mod List
- How to Install Minecraft Forge (Client-Side)
- CurseForge App Download
- Fabric Minecraft Mod Loader
- How to Manually Install Fabric
How do I install mods in Minecraft Java Edition?
To install mods in Minecraft Java Edition: Install Minecraft Forge for your game version. Download mod files in .jar format from a trusted source. Open the Minecraft launcher, select your Forge profile. Locate the mods folder in the game directory. If it doesn’t exist, create one. Place the downloaded mod files into the mods folder. Launch the game using the Forge profile to load mods.
Can I install Minecraft mods without Forge?
Most Minecraft mods require Forge or a similar mod loader to function. While there are a few standalone mods that don’t need Forge, nearly all popular mods are designed to run with Forge or Fabric.
What is Minecraft Forge and why do I need it for mods?
Minecraft Forge is a modding API that allows Minecraft to load and run mods. It acts as a bridge between the game and custom modifications, ensuring compatibility and stability. Without Forge, the game cannot interpret most mod files.
How do I add mods using the CurseForge launcher?
To add mods with the CurseForge launcher: Create or select a custom profile. Open the profile and click “Add More Content.” Browse or search for a mod and click “Install.” CurseForge will download and enable the mod automatically. Press “Play” to launch with the mod installed.