Overview
One of the perks of owning a Minecraft server is the option to enable offline mode. This lets people with unofficial copies of Minecraft join the server, but you lose access to whitelists and player skins in the process. The standard Steve skin is a classic, but we can all agree that having tons of Steve’s running around for hours can get a bit boring. The SkinsRestorer plugin was created to solve that problem. By installing this plugin on your server, you and your players can restore your normal skins, or use any other skin you happen to find and want to try. Here is how to install and use SkinsRestorer on your Apex Hosting server.
Modbox Installation
IMPORTANT: Make sure to have Spigot or Paper selected in the Game File option on your server panel so plugins can work properly.
- Head towards your Apex server panel for the server.
- Navigate to
Server Configuration > Modboxon the left.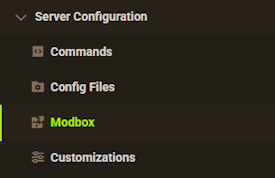
- Choose the version and search for the plugin you want, then select it.
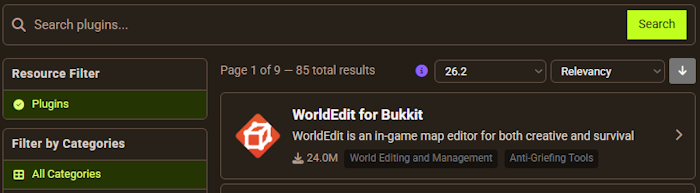
- Click
Installon the left and wait for it to be installed. - Restart the server to load the plugin. Repeat this process for any other plugins.
Manual Installation
Download SkinsRestorer on Bukkit or Spigot and follow these steps:
- Download the plugin file from the link above.
- Head towards your Apex server panel for the server.
- Locate the Game File option, then select Spigot or Paper if you haven't already.
- Navigate to
File Management > FTP File Accessand login. - Drag + drop the .jar file in the
pluginsdirectory. Alternative: Click theUploadbutton and select the file. - Wait for this to finish, then return to the main panel.
- Restart the server and the plugin should load properly once you join.
Usage

Using the plugin is pretty straightforward. There are only a handful of commands to change your skin along with a useful GUI that will show all of the different skins that have been used on the server since the plugin was installed. Here is a full list of commands along with examples of how to use them.
| Command | Usage | Example |
|---|---|---|
| /skin set |
Changes your skin to the one specified. Change |
/skin set iVestri |
| /skin update | Updates your current skin to the most recent version. This is useful if the skin you are using has been altered or isn’t displaying correctly. | /skin update |
| /skin clear | Removes your current skin and changes you back to the default Steve skin. | /skin clear |
| /skins | Opens the skins gui. This menu will show all of the skins recently used on the server. You can use one of the skins by clicking on it in the menu. | /skins |
| /sr status | Shows the current status of the plugin. This is useful if you are experiencing issues and want to make sure the plugin is still running properly. | /sr status |
| /sr props |
Change |
/sr props iVestri |
Conclusion
Being able to change your skin on the fly is a very useful tool for any server to have. This is great for players that don’t have an official copy of the game. Your players can use a custom skin instead of the default Steve we all know and love. They can also change at any time they like without ever having to leave the server. If they see a skin they like online or happen to make one while playing on the server they can switch to it very easily with just a few quick commands. With the help of this guide and the SkinsRestorer plugin, you are ready to bring more customization options to your server.
Helpful Links
How to Install Plugins
Plugin Installation Service
Our Recommended Plugins