


Thousands of players in Vanilla Minecraft may want to spice things up with extra features. These include new blocks, items, mobs, or even QoL changes. Regardless, all of this requires downloading and installing mods in Minecraft. This process requires using Forge or Fabric, APIs that allow modding capabilities. Whether you’re on the standard Minecraft launcher or using a third-party client, setting this up is entirely possible. In this Apex Hosting guide, we’ll show you how to install mods in Minecraft to get you started on a brand new adventure.
Installing Mods for Minecraft

There are different types of mods ranging in genres and themes, along with what API is required to run them. Keep this in mind, as Forge is incompatible with Fabric and vice versa. However, there are mods to make them support each other – but that’s entirely up to you. Besides this, make sure the game versions for what you want doesn’t change too much. Lots of mods don’t frequently get updated to the latest version, resulting in them being unplayable if you attempt to update. In other words, we encourage using Minecraft 1.20.1, 1.18.2, 1.16.5, 1.12.2, 1.8.9, or 1.7.10. These are the most popular versions for modding the game! When you’re ready to install mods for Minecraft, check out the subsections below.
Minecraft Launcher
Newcomers to the modding scene typically use this method to install mods, especially if they don’t have third-party launchers. All that’s required is an installed version of Forge or Fabric on the client, then a localized mods folder to place all the files. The following steps will guide you through this process.
- Download and install Forge / Fabric on your Minecraft Launcher.
- Afterward, navigate to your modded profile and click its
Foldericon.
- Create a new folder called “
mods” and place and mod files inside of it.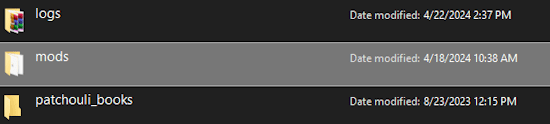
- When you’re finished, load up the profile to begin playing modded Minecraft.
CurseForge App
Rather than using the default launcher for Minecraft, consider using CurseForge. This client provides you with quick and easy access to any mods you want! Whether you want to have only one profile or a dozen, you have plenty of opportunities with this app. Follow the instructions below to get started.
- Download and install the CurseForge App on your computer.
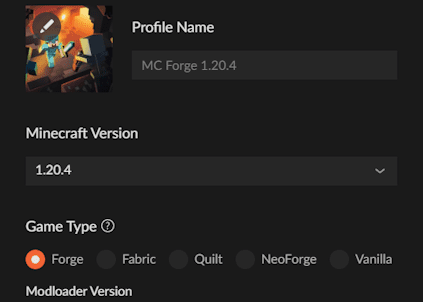
- Afterward, click
Create Custom Profilenear the top left corner.
- Proceed to edit the profile settings until you’re satisfied.
- When you’re done, click its three vertical dots and select the
Open Folderoption. - Begin to transfer any mod files into the “
mods” directory.
*Alternatively, select
Add More Contentto directly install mods from the app. - Once everything is finished, click the
Playbutton on your profile to load them up.
Other Clients
There are plenty of other Minecraft launchers available online, all of which can support mods. However, they might be different – such as only being able to install modpacks. The process for almost all of these clients are the same. If you want to add more mods to a profile or instance, drag and drop the files in the “mods” directory. This is found in the local files for it, which should be accessible from the options. It all depends on your type of launcher for this process.
Playing with Mods in Minecraft

Using mods in Minecraft is a great way to transform the entire game into something new to enjoy. Whether you want custom armor, unique mobs, better animations, optimizations, or other amazing features – installing them is all the same! The power is at your disposal, so get creative and explore what’s possible in modded Minecraft. Just remember that Forge and Fabric aren’t compatible with each other, meaning you must pick one. However, CurseForge allows you to create multiple profiles with their own mods folder. This means you’re able to play with both Forge and Fabric with different modifications, rather than moving tons of files each time with the default launcher.
Minecraft Mods – Common Issues
The best place online to find mods for Minecraft is CurseForge. However, you can explore other methods by visiting here. Although, we strongly recommend using CurseForge or its launcher to find more mods to install in Minecraft.
If you’re unable to find the local mods directory, then create it. This is achieved by right-clicking, then creating a new folder named “mods”. Afterward, you’ll be able to use it without any issues – assuming it’s in the right location on your computer.
Remember, installing different API or game versions can result in issues. One problem is that the entire game will crash. Avoid using different versions, including both Forge and Fabric instances of them. Only stick to one version and one API to play with mods in Minecraft.
Consider tweaking settings to resolve the performance issues. Alternatively, installing optimization mods can also help fix the situation. Find out more about this here!
Useful Links
How to Install Forge on Minecraft
How to Install Fabric on Minecraft
CurseForge App Download
Allocating More Memory to Minecraft


