


Overview
Adventuring into the immense universe of Starbound brings countless adventures to share with other survivors. Whether you’re exploring the first planet or deep within Baron’s Keep, having a journey with friends can be tons of fun. However, sometimes unwanted players join the server and interrupt your gameplay. This may happen for various reasons, leading to frustration since it’s difficult to block random users from joining. Fortunately, our panel provides you with a simplistic way to whitelist the server so no unauthorized players can connect. The process is done by adding accounts to your configuration, making only them allowed in-game. Regardless if you’re experienced or inexperienced with editing settings, we’ve made it easy-to-follow. With this in mind, our Apex Hosting tutorial will show you how to add multiple accounts in your Starbound server to create a whitelist system.
Account Whitelist System
As hinted above, there is no official whitelist option for Starbound servers. This is due to the current game’s design, but adding accounts to your configuration mimics a whitelisting system. Owners are permitted to create any number of users for their server to prevent unwanted players from joining. This process requires you to disallow anonymous connections, enter specific settings for the accounts, and use that information to join. We’ve split this up into three subsections for you to easily follow along down below.
Making a Private Server
Before adding any account, configuring the server to be private is required. This rejects all incoming connections, as it’s only allowed to accept known users. The following instructions detail more information about setting this up on your Starbound server.
- Head towards your Apex server panel, then click
Config Filesnear the top left.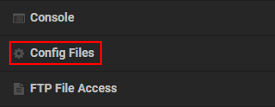
- Select the
Server Configoption to reveal its contents.
- Afterward, locate the allowAnonymousConnections setting in the file editor.
- Once found, change its value from true to false.
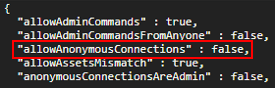
Important: Keep the comma for the “false” value, as it’s the required format.
- Keep this area opened for additional configuration.
Creating User Accounts
The process for adding new user accounts may seem challenging at first, but becomes easier with practice. It involves unique code and formatting that’s heavily important, as incorrectly configuring it leads to problems. Additionally, you’re able to give these new accounts admin privileges if you want. The steps below describe exactly how to accomplish this goal.
- In the
Server Configarea, locate the serverUsers setting.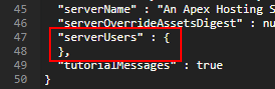
- Copy and paste the following code in between the brackets on a new line:
"UsernameHere" : { "admin" : false, "password" : "PasswordHere" } - Do the same on another line for multiple accounts, but add a comma on the last bracket.
- Start entering the usernames and password accordingly.
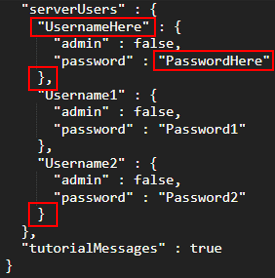
Important: The final user added will have no comma after the last bracket.
- Afterward, press
Saveat the top and return to the main panel toRestartthe server.
Logging into the Server
After setting up the server with your whitelist system, you’re ready to join. Make sure to copy down your account details beforehand, as they’re required to make a successful connection.
- Launch Starbound and click
Join Gamein the menu options.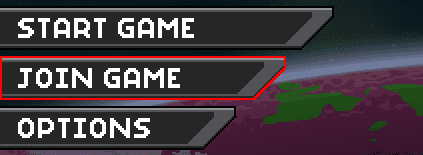
- Continue to create or choose an existing character for the account.
- Proceed to enter your
IP Address,Port,Username, andPassword. - Afterward, click
Join Serverat the bottom to establish the connection.
- If successful, you’ll appear in-game with your custom account.
Common Issues
Unable to Join with Account
This is a popular issue to have, as sometimes the wrong information can be used to join the server. Other times, no account is entered when attempting to connect. These mistakes can result in a few errors, which may confuse some players. Keeping this in mind, resolving it requires you to double-check the serverUsers list in your Server Config to confirm the account details. Make sure the Username and Password are being used correctly when joining. However, if you want accounts to be optional, then set the allowAnonymousConnections setting to true. Save the changes and Restart the server so it applies. Afterward, everything should be fixed and ready to go.
Configuration Isn’t Working
In some cases, the Server Config doesn’t save or apply and doesn’t enable the whitelist system. This is likely due to not saving or restarting after the changes, so ensure you’re doing that afterward. Otherwise, you can Force Stop the server before doing anything, then proceed accordingly. Alternatively, resetting the file is an option so the default settings reappear for you to edit again. This is accomplished by logging into the FTP File Access area from the main panel, then entering the storage directory. Once there, check mark the starbound_server.config file and press Delete at the top. When you’re finished, simply return to the panel and Restart the server.
Useful Links
How to Make a Starbound Server
How to Join a Starbound Server
How to Add Mods to Starbound Servers
Starbound Admin Access and Commands
Starbound Guides


