Overview
Minecraft has many features that enhance the gameplay, such as the ability to use a blast furnace to efficiently smelt ores. Unfortunately, sometimes there aren’t enough quality of life mechanics to help players enjoy the game. For example, being unable to view a dropped item’s despawn time can occasionally result in losing loot. This can easily become a nuisance for players in Minecraft servers, leading some owners to search for solutions. Solving this scenario involves using Spigot plugins, addons that implement new features to the game. With this in mind, an excellent choice is InteractionVisualizer, used to add helpful visuals in-game to raise the game’s quality. Using this will make crafting recipes appear on the workbench, showcase smelting progress, among other useful aspects. Whether you’re wanting to quickly glance at your furnace to know its progression or check what item a player is crafting, these features make many activities simpler. Installing and using this plugin is a smooth process in our panel, but can still be a challenging task for new owners. Due to this, we’ve created this Apex Hosting tutorial to walk you through the necessary steps to install, use, and configure the InteractionVisualizer plugin on your Minecraft server.
Installation
Note: InteractionVisualizer requires the ProtocolLib dependency to function properly (Minecraft 1.19 and above may require its dev build). If your server runs Minecraft 1.16.5 or below, you’ll also need the LightAPI Fork dependency. Install these first using either method below, then return here to continue.
Modbox Installation
IMPORTANT: Make sure to have Spigot or Paper selected in the Game File option on your server panel so plugins can work properly.
- Head towards your Apex server panel for the server.
- Navigate to
Server Configuration > Modboxon the left.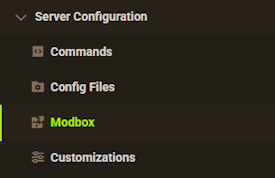
- Choose the version and search for the plugin you want, then select it.
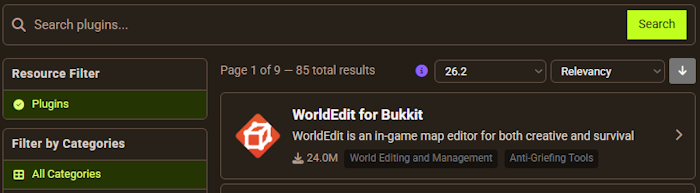
- Click
Installon the left and wait for it to be installed. - Restart the server to load the plugin. Repeat this process for any other plugins.
Manual Installation
Download InteractionVisualizer on Bukkit or Spigot and follow these steps:
- Download the plugin file from the link above.
- Head towards your Apex server panel for the server.
- Locate the Game File option, then select Spigot or Paper if you haven't already.
- Navigate to
File Management > FTP File Accessand login. - Drag + drop the .jar file in the
pluginsdirectory. Alternative: Click theUploadbutton and select the file. - Wait for this to finish, then return to the main panel.
- Restart the server and the plugin should load properly once you join.
Getting Started

Once you’ve installed the plugin, it may be immediately noticeable or not depending on what you’re doing in-game. For example, anything currently smelting now shows a hologram. There are tons of other new visuals to discover in your world, with some being more apparent than others. We’ll briefly go through common ones to give you a better understanding of what InteractionVisualizer does on the server. Additionally, we’ll be reviewing the plugin’s commands and configuration to help you control its features. Everything about this is straightforward and doesn’t require too much effort to use.
Enhanced Visuals
As the name suggests, InteractionVisualizer adds extra visible information that all players can view in-game. These mostly happen upon interacting with blocks and entities, such as using an anvil to add enchantments on weapons. Almost everything will have a hologram overlay, which is completely customizable if you want. Check out some examples down below to see what’s possible with the plugin.

Using a workbench to create items will now appear on the actual block that other players can see. A good example of this is crafting a diamond pickaxe, as it’ll show you placing the sticks and minerals in their respective slots. Once the recipe is finished in the GUI, the desired item will display over the workbench in-game. This allows others to view what you’re creating, making it more realistic.

Cooking food, smelting ores, or anything else has a progress bar for when it’s completed. It also reveals the amount left inside the furnace, smelter, and other applicable blocks. Additionally, the item being worked on appears at the top of it in-game. These aspects also apply to all campfires, making it extremely useful. Instead of constantly checking the GUI for progress updates, you can simply look at the block to find that out.

Enchantment tables with items inside of them will have it float above the block in-game. Upon choosing an enchant for the weapon, tool, or armor piece, it’ll slowly go upwards and have particle effects. Afterward, the enchantment(s) get displayed with the corresponding levels. This adds a fun aesthetic to the game and allows players to immediately view what you picked.


There are tons of other useful and interesting visuals to encounter as you play on the server. These can include brewing potions that have similar visibility like smelting. Other ones are when mobs will appear from a spawner or a dropped item’s despawn time, among other information. Some of the visuals will be more helpful than others, so keep this in mind as you begin customizing the plugin.
Commands
In some cases, you or other players may want to disable a particular visual in-game. This can be for a variety of reasons, but is completely possible through commands. However, sometimes the visuals can run into problems and need to be refreshed. Luckily, the corresponding commands for doing this and toggling features are accessible by default players. This gives everyone the chance to control what appears in-game on their client, not for the server. For example, disabling furnace holograms doesn’t remove it for everyone. If you’re wanting to completely delete a feature from the plugin, then it requires tweaking some settings. If you’re wanting to grant access to other commands, then using LuckPerms or another similar addon is required to manage their permission nodes. Otherwise, becoming a server operator will grant you the ability to use them. With this in mind, review the list below to learn about them all.
| Command | Permission | Description |
|---|---|---|
| /iv reload | interactionvisualizer.reload | Applies recent config changes to the game. |
| /iv refresh | interactionvisualizer.refresh | Allows players to refresh all visual displays from the plugin. |
| /iv update | interactionvisualizer.update | Allows you to receive plugin update messages. |
| /iv toggle [visual] [entity] [true/false] | interactionvisualizer.toggle | Enable or disable certain visualizations in-game. |
| N/A | interactionvisualizer.toggle.others | Toggle visuals for other players. |
Configuration
Briefly mentioned above, you can disable certain visual effects from editing the plugin’s settings. This is done through its configuration file, accessible directly in the server panel. However, toggling features isn’t everything you can do, as there are chat messages to edit. There’s also hologram colors to change, among tons of other useful aspects. Follow along down below to start editing these settings to fully customize InteractionVisualizer.
- Log into your
FTP File Accessarea and enter thepluginsdirectory. - Locate and select the
InteractionVisualizerfolder.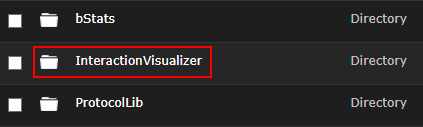
- Once inside, press
Editto the far right of the config.yml file.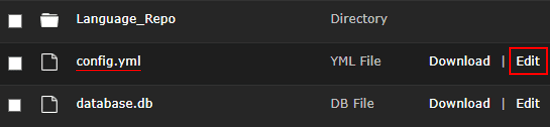
- Make any necessary changes in the editor, then click
Saveat the top.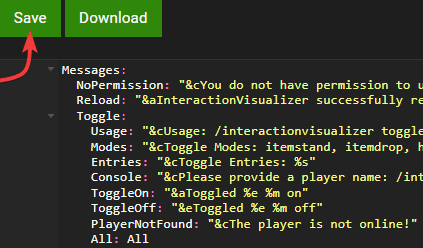
Restartthe server from the main panel and join to confirm it works.
Common Issues
If you’re trying to get InteractionVisualizer working and it’s failing, then double-check you’ve installed the dependencies. This includes ProtocolLib, but also LightAPI Fork if the server is using 1.16.5 or below game versions. Once they’re properly uploaded in the FTP, Restart from the main panel to see if it’ll work. However, it may still be possible that InteractionVisualizer is failing due to an incompatible server profile. Confirm you’re using the right one when setting up your server with these plugins. These will likely solve the problem and get everything working.
Sometimes, the plugin’s configuration won’t save or apply to the server due to incorrect format. Make sure that your settings aren’t returning errors, have typos, missing spaces, or anything else that may cause the problem. A common issue is mistakenly removing quotation marks when changing chat messages, so double-check your settings. Once everything looks good, Save the edits from the file editor and Restart the server from the main panel. However, use the /iv reload command if the issue persists, as this refreshes the config so new changes get applied.
Useful Links
InteractionVisualizer on Spigot
How to Add Plugins to a Minecraft Server
Becoming a Server Operator in Minecraft
How to Setup and Use LuckPerms