Most MineColonies servers that refuse to boot fail for the same dull reason: the wrong mod loader, or a dependency that is one version too old. Get those two things right and the MineColonies mod turns an empty plain into a working town, with NPC builders, farmers, miners and guards doing the work while you plan the streets.
This guide covers choosing the right version, installing MineColonies and its dependencies on your Apex server (manually or through Modbox), setting up each player’s client, and getting your first colony past the idle-builder stage. It ends with the settings that matter once other players join.
Which MineColonies Version Should You Run?
Run MineColonies on Minecraft 1.21.1 with NeoForge for the newest builds, or on 1.20.1 with Forge if your modpack is built around that version. There is no Fabric release, and the current builds stop at 1.21.1, so a server on Minecraft 26.1 or later can’t load the mod.
| Minecraft Version | Mod Loader | Status |
| 1.21.1 | NeoForge | Newest builds, best choice for a new server |
| 1.20.1 | Forge | Still receiving builds, common in older modpacks |
| 26.1 and later | None | No MineColonies build available |
| Any version | Fabric | Not supported |
The mod is developed by LDTTeam (Let’s Dev Together), an open-source developer community that publishes the MineColonies source code on GitHub. It has passed 80 million downloads on CurseForge, and the official wiki is written against the 1.20.1 and 1.21.1 releases.
If you are still deciding on a loader for the rest of your pack, our guide to setting up a modded Minecraft server explains how Forge, NeoForge and Fabric differ.
Mod Download
Download MineColonies from its official CurseForge page, and pick the file that matches both your Minecraft version and your loader. A 1.21.1 file will not load on a 1.20.1 server, even if everything else is correct.
- Navigate to the MineColonies CurseForge page.
- At the top, proceed to “
Files” to view all downloads.
- Scroll down to the “
Recent Files” section, then press the “View All” button. - Here, search for and select the latest download for your desired game version.

- Press the “
Download” button in the top-right to begin installing the .jar file.
Mod Dependencies
MineColonies won’t start without its library mods. Each release lists the exact minimum versions it needs in its changelog, so read that before you download anything else.
- Return to the MineColonies version page that featured the download button.
- In the changelog, make note of any required dependencies and versions.

- These may include:
- Like with the main mod, visit the “
Files” and “View All” section for each dependency. - Ensure the required version listed in the changelog is downloaded for each file.

For reference, the 1.1.1368 release for 1.21.1 asks for Structurize 1.0.832, MultiPiston 1.2.51, BlockUI 1.0.199 and Domum Ornamentum 1.0.223 or newer. Newer MineColonies builds tend to raise those minimums, so update the libraries whenever you update the main mod.
Server Installation
Check which loader your MineColonies file needs before you touch the panel. The 1.21.1 builds run on NeoForge, so pick the NeoForge entry for 1.21.1 where the steps below mention Forge; the 1.20.1 builds use Forge as written.
- Navigate to the Apex Server Panel, then stop the server.
- Scroll down to the “
Game File” section, then open the dropdown.
- Select the “
Forge” version that matches your mod. - Follow the prompts, then choose to restart later.

- In the left-hand menu, enter the “
FTP File Access“. - Here, locate or create the
modsfolder, then enter it. - Press “
Upload” in the top-left, then drag + drop all mod files.
Once the upload finishes, return to the main panel page and start the server. If the console stops on a missing or outdated dependency, the error names the mod and the version it expected. Upload that file to the same mods folder and start the server again.
Modbox Installation
As an alternative to the manual installation, you can install MineColonies on your server using Modbox, our built-in mod browser with direct CurseForge integration.
- Log in to your Apex Hosting account and open your Minecraft server panel.
- On the left side, select “
Server Configuration > Modbox“.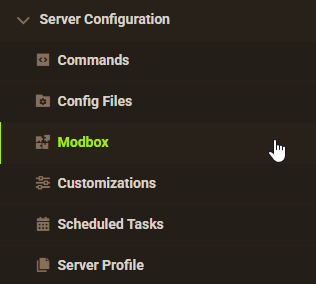
- Search for the mod you want and open its mod page.
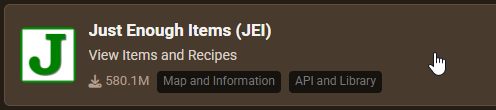
- Select the recommended version for your server, then click “
Install“.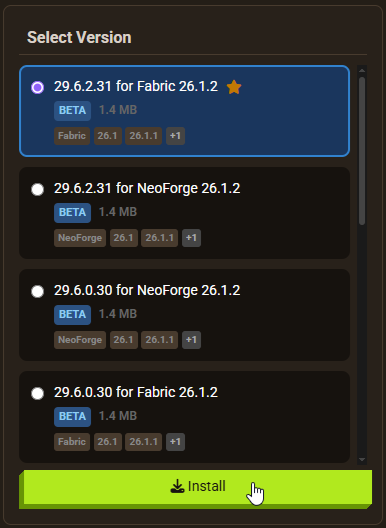
Modbox matches mods to your server’s installed version, but it does not install dependencies for you. Search for Structurize, Multi-Piston, BlockUI and Domum Ornamentum one at a time and install each before MineColonies itself. Our Modbox walkthrough covers updating and removing mods once they’re installed.
Client Installation
Every player who joins needs the same MineColonies build and the same dependencies on their own computer. For a 1.21.1 server, use the installer from the NeoForge website in place of Forge in the first two steps; everything after that is identical.
- Visit the Forge Download page.
- Install Forge for your system as seen in our guide here.
- Once installed, open your Minecraft launcher for your system.
- Proceed to “
Installations” at the top, then highlight your Forge version. - Press the folder icon to the right to open up your file browser.

- Here, locate or create a
modsfolder, then enter it. - Finally, add your mod files to this folder.

Start the game with your Forge or NeoForge profile and join the server. A player whose files don’t match the server gets a mod mismatch screen instead of the world, which is usually the fastest way to spot an outdated dependency.
How to Start Your First Colony
Starting a colony takes five moves: craft a supply camp or ship, place it, take the town hall and build tool from its chest, place the town hall, then right-click it and create the colony. Four citizens arrive, and your first job is giving one of them a builder’s hut.
Nothing changes when you first spawn in. MineColonies doesn’t generate towns on its own, so everything starts from that one supply structure.
Supply Camp and Ship


The supply camp and supply ship are the only way to get your first town hall. Both give the same result, so the choice comes down to terrain. The camp is crafted from chests and needs clear, flat ground of at least 16 by 17 blocks. The ship is crafted from boats and needs open water of at least 32 by 20 blocks, or lava if you’re starting in the Nether.
The exact crafting grids are on the official supply camp and ship wiki page, and JEI shows them in-game if your pack includes it.
Choose the spot carefully. According to the wiki, once you place a camp or ship you can’t place another in that world unless you find one in a treasure chest. On a shared server, tell new players that before they drop theirs in a swamp.
Learning the Placement Controls

Use either supply item on a block and a placement GUI opens. From here you can change the block palette, then move and rotate the structure until it sits where you want it. If the menu blocks your view, press Escape to close it, then right-click the item to reopen the GUI. When you’re happy with the position, press the green box to place the structure.
Every building in MineColonies uses this same preview menu, so the time spent learning it now pays off for the rest of your town.
Gathering Your Tools

Walk into your placed camp or ship and open the chest inside. It holds the two items you need: the build tool and the town hall. Take both. The rest of the structure is decoration, so don’t worry about protecting it.
The Build Tool

Find a spot with room to grow, then use the build tool in your hand to open the same placement GUI. Select townhall in the top-left box, then use the middle box to choose the style. The top-right box lets you preview the upgrade levels, which is handy for checking how much space the finished hall will need. Position the building, then press the green box.
Creating the Colony

This time the structure won’t appear right away; you get only the town hall block. Right-click the block, then press Create Colony. Within a few minutes your first four citizens spawn.
The town hall also sets your colony’s borders. The town hall wiki page puts a new colony’s protected area at four chunks in each direction from the hall, which matters on a server where another player’s colony could end up next door.
Builder’s Hut: Build It Before Anything Else


The builder’s hut has to come first, even before the town hall structure itself. Your builder must construct their own hut before any other building, and they can’t build or upgrade anything to a level higher than their hut. Craft and place the hut block, open it, choose Build Options, then Build Building.
That last click gives your new builder their first job: building the hut they’ll work from. The official builder wiki page lists every material request and upgrade requirement.
Early on, you’ll hand over most materials yourself. The builder posts requests for each block and tool they need, and the job pauses until those items show up. That changes once a warehouse and couriers move items around for you.
Check three things in order: a citizen is hired in the hut’s worker menu, the hut has an active build order, and the materials the builder has requested are in the hut’s inventory.
Look at your builder’s hut level first. A level 1 builder can’t take a town hall or any other hut to level 2, so upgrade the builder’s hut before anything else.
What to Build Next
After the builder’s hut, add citizen huts to grow your population, then a warehouse so resources stop piling up in random chests. Get a guard tower or barracks up before your colony starts drawing raids, because raiders show up on their own schedule.
Citizen huts matter more than they look. Your colony can’t grow past four citizens without housing, and more citizens means more workers on construction. Once the warehouse is up, couriers start carrying items between buildings, and that’s when the colony begins running without you ferrying cobblestone by hand.
Raids are the part new colonies underestimate. According to the raid wiki page, raids start at nightfall and can spawn anywhere outside your buildings. Pirate raids arrive with a ship whose spawners keep producing pirates until you break them.
A guard tower is the cheap answer. A barracks is the long-term one: each barracks tower houses one guard per level, up to five guards per tower. From level 3, the barracks can also hire spies that make raiders glow.
Running MineColonies on a Multiplayer Server
On a shared server, three things decide whether MineColonies stays fun: who can touch each colony, how hard raids hit, and how much load a growing town puts on the server. You can adjust all three.
Start with permissions. Every colony is protected by MineColonies’ anti-griefing system, and the town hall’s permissions menu lets the owner add other players and assign ranks such as officer. Those ranks control who can build, break blocks or manage citizens inside the colony’s borders. For a group town, add your co-builders as officers rather than sharing one account.
Next, raids. MineColonies’ server config includes dobarbariansspawn, which turns raids on or off, and barbarianhordedifficulty, a 0 to 10 modifier that defaults to 5. Stop the server, open “FTP File Access“, and search the MineColonies config file for those keys. Key names have shifted between releases, so confirm them against the config page on the wiki for your build. Lowering difficulty on a casual server is a reasonable call. Disabling raids on a survival server takes away most of the reason to build guards.
Be careful with addons. The MineColonies developers warn that some third-party addons change the mod in ways that cause stability and performance problems, and they won’t support issues caused by them. Add one addon at a time and test a restart after each.
Finally, plan your memory. Every citizen is an entity with its own pathfinding and job logic, so a busy colony puts more work on the server than the same number of players building by hand. Our guide on how much RAM your server needs helps you size the plan before your town reaches its third district.
And if you’d rather skip dependency matching entirely, the Life in the Village modpack bundles MineColonies with Millénaire and installs from the panel in one click.
MineColonies FAQ
Quick answers to the questions players ask most about MineColonies on a server.
Does MineColonies Work on Fabric?
No. MineColonies only releases builds for Forge on Minecraft 1.20.1 and NeoForge on Minecraft 1.21.1. There is no official Fabric version.
What Minecraft Version Does MineColonies Support?
The current builds target Minecraft 1.21.1 on NeoForge and Minecraft 1.20.1 on Forge. Check the Files tab on CurseForge for the newest release before you set your server version.
Who Makes MineColonies?
MineColonies is developed by LDTTeam (Let’s Dev Together), an open-source developer community. The source code is public on GitHub.
How Many Citizens Do You Start With?
Four. They spawn shortly after you right-click the town hall and create the colony. You need citizen huts to grow past that number.
Can You Place a Second Supply Camp?
Not in the same world. Once you place a supply camp or supply ship, you can’t place another one unless you find one in a treasure chest.
Helpful Links
- MineColonies on CurseForge
- Official MineColonies Getting Started Wiki
- MineColonies Release Notes on GitHub