Overview
When creating and running a Minecraft server, customizing its looks can be vital for keeping players interested. Whether it’s a unique server icon or a personalized message of the day, these can be helpful but are oftentimes limited in what can be changed. This issue is rectified thanks to ServerListPlus, a Spigot plugin that allows you to adjust the various aspects of your server’s appearance in the multiplayer menu. With the ability to add multiple MOTDs, custom icons, and even set messages in the online player count, there are tons of possibilities with this plugin. With this in mind, we have created this Apex Hosting tutorial to help you get started with ServerListPlus.
Modbox Installation
IMPORTANT: Make sure to have Spigot or Paper selected in the Game File option on your server panel so plugins can work properly.
- Head towards your Apex server panel for the server.
- Navigate to
Server Configuration > Modboxon the left.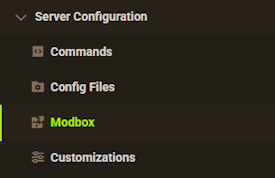
- Choose the version and search for the plugin you want, then select it.
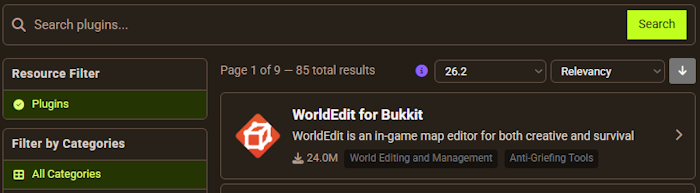
- Click
Installon the left and wait for it to be installed. - Restart the server to load the plugin. Repeat this process for any other plugins.
Manual Installation
Download ServerListPlus on Bukkit or Spigot and follow these steps:
- Download the plugin file from the link above.
- Head towards your Apex server panel for the server.
- Locate the Game File option, then select Spigot or Paper if you haven't already.
- Navigate to
File Management > FTP File Accessand login. - Drag + drop the .jar file in the
pluginsdirectory. Alternative: Click theUploadbutton and select the file. - Wait for this to finish, then return to the main panel.
- Restart the server and the plugin should load properly once you join.
How to Get Started

Upon connecting to your server for the first time, the plugin will be loaded but will not be enabled by default. In order to allow the plugin to function, you will need to use the /serverlistplus enable command from in-game. Once done, a message will appear in-game letting you know that the plugin has been successfully enabled.

You can check the default configuration settings by disconnecting from the server to access the server list menu. Here you should see that your Message of the Day has been changed to a new message. Additionally, hovering over the player count number will display an extra message.
The default messages are likely not what you want to display on your server. To remedy this, the plugin can be customized to suit your needs.
Accessing the Configuration File

In order to adjust the plugin messages to your liking, you will need to edit the plugin’s configuration file. This will allow you to edit the two messages and even the server icon.
- From the Apex panel, stop the server and wait until it is fully offline.
- Return to the
FTP File Access, then navigate to/plugins/ServerListPlus/. - Locate the
ServerListPlus.ymlfile, then pressEditto the far-right.
- Make the desired changes using the below info, then press
Save. - Once prompted, restart the server to load up the changes.
Adjusting the Config
Within the Status section of the config file, there are two main areas to edit. The Default messages are displayed for a user who has never joined the server or their username is unknown. The Personalized messages are for a user who has joined the server at least once.
Description:
The text that appears as the MOTD within the server list. These can use color codes, placeholders, and more. Additionally, multiple descriptions can be added and will randomly display whenever the in-game server list is refreshed.

Players:

Displays a message when the player count is hovered over with the mouse. This can also be customized using the various settings provided previously.
Favicon:

If added to the configuration file, allows you to adjust the server icon to a variety of settings. These include adding multiple images, using image folders, image URLs, player skins, and more. For the full information on this, consider visiting the wiki.
In-Game Changes

Once you have saved the file, use /serverlistplus reload from in-game or the same command in the server console without a /. Once you refresh the server list page, you should find your new changes have taken effect. If you have added multiple messages, you can continuously refresh to see the others.
Common Issues
The enable command does not work:
If the command is not registered from in-game, use /plugins to confirm whether or not the plugin is listed. If not, ensure the files were uploaded directly into the plugins folder, as they will not function elsewhere. After this is fixed, restart the server to try to enable the plugin features once again. If the plugin is listed, ensure you are a server operator to gain access to all commands.
I receive an error when saving the configuration file:
After editing the configuration file, you may receive a formatting error when attempting to save. Press Cancel and check your file to find where the red X is listed. If it is under a section you have edited, ensure you have all the necessary spaces and apostrophes. Otherwise if it is under a section that was unchanged and it looks correct, you can save the file anyway and reload as normal.
Helpful Links
ServerListPlus Spigot Page
ProtocolLib Spigot Page
ServerListPlus Wiki