


Overview
ARK: Survival Evolved is an amazing game to play with other players, as conquering dinosaurs and the world leads to fantastic adventures. However, it may be difficult to sustain a community without dedicated server hosting. This is due to the owner having to be online for others to start playing, but with servers it can be active forever. In other words, you and anyone else can easily join ARK to immediately play. Additionally, these servers offer a wide variety of customizable features such as dino settings, mods, custom maps, whitelists, and cheats. There are more configurable options for you to explore, which is done with our easy-to-use Apex Hosting panel. We’ll go through how to make an ARK server and its configuration to get you started.
How to Make an ARK Server
- Head towards your Apex server panel and locate the Game File option.
- Click the current server version, then lookup and select ARK: Survival Evolved.

- Confirm the changes, generate a new world, and Restart the server afterward.

- Wait for the server to load everything, which may take a few minutes.
Once completed, you’ll see a check near the top of the panel where it’d say “Online”.
Getting Started
ARK: Survival Evolved is a rather large game, which means the server will have a lot of configurable options. We’ll start exploring the most important information to give you an idea of where to begin your server owning journey. Some of these will be extremely basic, while others will be noticeably different. Regardless of this fact, our user-friendly interface will make these processes easier on you.
Joining the Server
- Locate and copy the
IP Address:Portnumbers from your server panel.
Note: Make sure you copied the Steam version of the numbers.
- Open Steam and press View in the top left, then select Servers.
- Afterward, continue to the Favorites tab and click Add a Server.
- Enter your server’s
IP Address:Port, then press Add This Address to Favorites.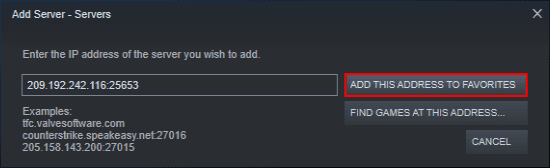
- Launch ARK: Survival Evolved and select Join ARK from the menu.
- The session filter needs to be on Favorites, which will display your server.

Note: You may have to Refresh the list to see it.
- Once you do see the server, click it and continue to Join near the bottom.
Adding a Server Password
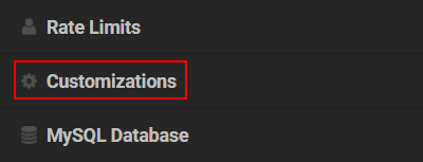
- Navigate to your server panel and on the left, press Customizations.
- At the top of the page under Security, enter anything in the Server Password field.

- Once you’re done, return to the main panel and Restart the server to apply changes.
Setting up Whitelist
- Head towards Customizations from your server panel.
- Locate the
Server Whitelistoption under Server Settings.
- Check mark this setting, then Restart the server from the main panel.
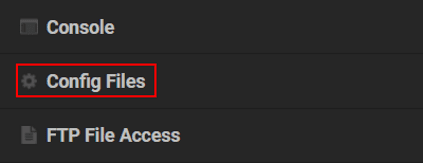
- Once it loads, Stop the server and navigate to Config Files on the left.
- Click on the ARK Whitelist File option, then keep this tab open for later.
- Head to Steam IO and input your Steam username or the desired player’s username.
- Copy the
SteamID64values, then return to the ARK Whitelist File.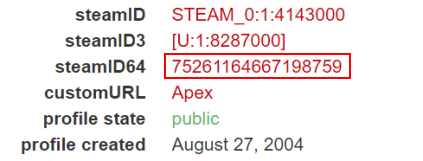
- Paste every account ID on a new blank line in the file.
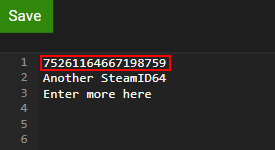
- Afterward, press Save in the top left and Restart the server to apply changes.
How to Set Admins
- Navigate to the Customizations area from your server panel.
- Locate the
Admin Passwordfield in the Security category.
- Change the password to anything you want, then return to the main panel.
- Restart the server so the new password can be applied.
- Once everything is loaded, join the server and press
TABon your keyboard. - Enter the following command:
enablecheats [Admin Password]
Example: enablecheats MyPassword123
- Afterward, use
cheat flyandcheat walkto confirm you have admin privileges.
Changing Server Settings
The main benefit to hosting ARK servers is being able to completely control its settings. By default, the server files don’t generate every option to edit. Due to this, you’ll want to learn how to edit and add settings to the panel. Visit ARK’s Server Configuration wiki for more information about settings to help you get started.
- Head towards your Apex server panel, then press Stop and click Config Files on the left.
- Select the Server Configuration option, which is the
GameUserSettings.inifile.
- At this point, you may now change existing values or create blank lines to paste new settings.
Note: Don’t change any values from the file that are controlled in Customizations.
- After editing the configuration, press Save in the top left and Restart the server.
You may learn more about changing existing or adding new settings in our guide here.
How to Add Custom Maps

Adding custom maps is a wonderful way to explore mods and new adventures with friends. These can widely range from serious maps to simply entertaining ones. You can visit ARK’s Workshop to find the perfect map for you, then follow our tutorial for installing it on your server. Once it’s installed, all players would be able to join after downloading the map(s) to instantly start playing. These custom worlds may have issues running or other problems, as they are developed by creators and normal players. Make sure to test out any map before installing it, so you avoid unwanted frustrations in the future.
Installing Server Mods

Similarly to custom maps, ARK mods allow for new ways to play the game. These can be new weapons, creatures, and more on their workshop page. Once you found desired mods, then follow our guide to install them on the server. Using them with friends combined with other custom settings can truly create a unique experience. Otherwise, it can simply increase the gameplay’s quality without changing the base game too much. When everything is set, start enjoying modded ARK with your friends!
Conclusion
Playing ARK: Survival Evolved servers allows you and others to enjoy custom-made experiences. Whether you install maps and mods or simply tweak server settings, the control is yours to wield. Configuring everything may take a few tries, but should become easier as you continue development. Half of owning an ARK server is researching what type of mods, maps, and settings you want. Using the collected information in this guide will help you with this journey. With this in mind, we hope this resource helps you configure and make an ARK server.
Useful Links
SteamID.io Website
How to Change ARK Server Settings
How to Add ARK Mods to a Server
Adding a Custom Map to ARK Servers


