Amplifying your Valheim server with mods opens the door for all types of gameplay opportunities. Whether you prefer extra buildings, new creatures, custom items, or QoL changes, you have plenty of options. Setting up mods on your Valheim server and client is extremely straightforward, but can be challenging for newcomers. There are multiple ways to accomplish the same goal, with some being better than others. With this in mind, we’ll show you how to add mods to Valheim servers in this Apex Hosting guide!
Valheim Mod Information
For any mods to work properly in Valheim, BepInEx is required. This offers support for everything to load in-game, along with generating required files. The Valheim server and client must have this loader installed. There’s an alternative known as Valheim Plus, but isn’t as optimized. We’ll be using BepInEx in this tutorial, so keep that in mind. Besides this, there are mod managers that you can use instead of manually installing mods on your computer – we won’t be showcasing any of these external launchers.
Valheim BepInEx Server Setup
If you don’t already have a server with us, purchase one before following the instructions below. Afterward, you can use our tools to instantly install BepInEx on your Valheim server without prior technical knowledge.
- Head towards your Apex server panel, then locate the
Game Filearea. - Proceed to click on the selected option and type “Valheim” in the search bar.

- Click on Valheim (BepInEx) and confirm the changes in the prompts.
- Press the
Restart Nowbutton, then wait for the server to come online.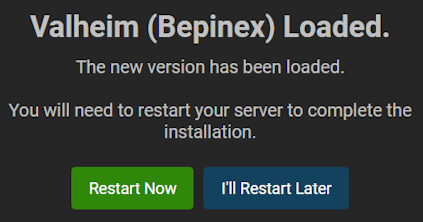
*This can take a few minutes to complete.
Valheim BepInEx Client Installation
The following instructions are for players who want to install BepInEx on Valheim without any third-party launcher, such as Thunderstore or Nexus. If you do use these external programs, then skip this section.
- Navigate to BepInEx on GitHub, then click
Releaseson the right. - Scroll down and select the “BepInEx_” file corresponding to your OS.
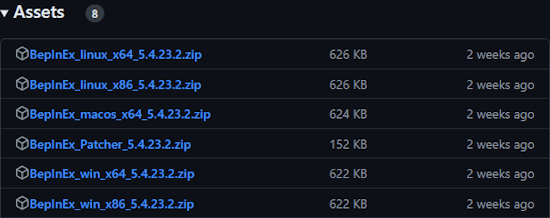
E.g. BepInEx_win_x64_5.4.23.2.zip for Windows 64-bit.
- Save this zipped file somewhere easily accessible on your computer.
- Launch Steam and right-click Valheim, then select
Browse Local FilesfromManage.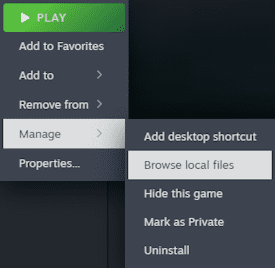
- In the new window, drag and drop the contents of the BepInEx zip file into here.
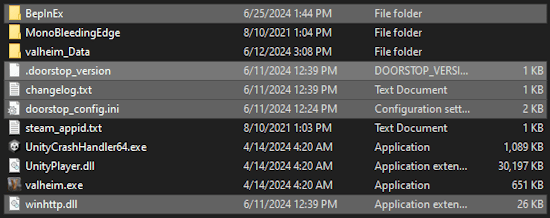
*The contents can be accessed by unzipping / opening it via WinRAR or 7-Zip.
- Afterwards, launch the game once to generate the required files.
Adding Mods to a Valheim Server
Once you have BepInEx installed and activated for the first time in Valheim, you’re able to install mods! All that’s required is transferring the specific mod file into a unique directory, then you’re finished. Review the sections below to learn more about this process and how to download mods. Keep in mind that third-party launchers aren’t being used in this article.
Downloading Valheim Mods
- Navigate to Thunderstore for Valheim mods, then find your desired one.
- Once found, select it and continue to click
Manual Download.
- Save the file on your computer, then unzip / open it with an external program.
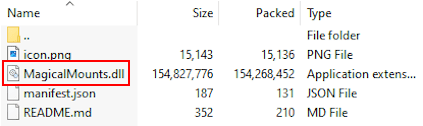
- Drag the
.dllfile(s) on your desktop for later installation on the server and client.
Installing Mods on the Server
- Head towards your server panel, then click
FTP File Accessat the top left.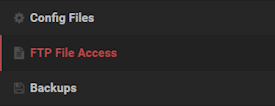
- Proceed to the
…/BepInEx/pluginsdirectory after logging in with your credentials.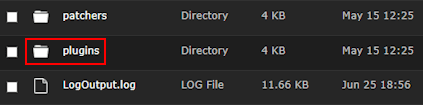
- Press
Uploadat the top left corner, then drag and drop the.dllfile(s) accordingly.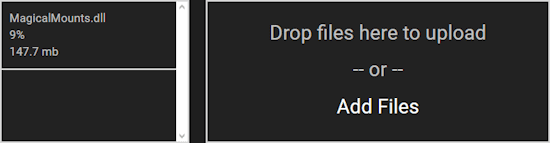
- Wait for them to reach
100%. Afterwards, return to the main panel. Restartthe server so the mods can load and generate the required config files.
Installing Mods on the Client
- Right-click Valheim from Steam and select
Browse Local FilesfromManage. - Continue to the following directory in the new window:
…/BepInEx/plugins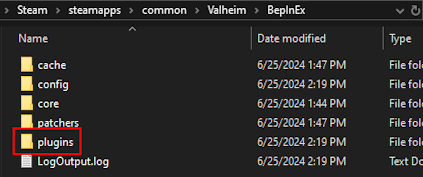
- Proceed to drag and drop the
.dllfiles in this folder.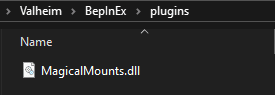
- Launch the game and join the server to confirm everything works.
Valheim Plus (Alternative Method)
In cases where you don’t want to use BepInEx on your Valheim server, then Valheim Plus is an alternative. This is essentially the same loader but is less optimized and prone to issues. We offer this in our Game File area of the panel for quick installations. As for client-side setups, you must install it from here to get started. The process is relatively the same as BepInEx but with different files.
Using Mods in Valheim
There are many different mods available in Valheim to kickstart new adventures with friends on your own dedicated server. Whether you focus primarily on new items, creatures, structures, or QoL changes – you have hundreds of options to choose from online. Setting them up is straightforward, especially with any external launcher. Regardless of how you accomplish this goal, we hope this article helped you install mods on a Valheim server and client.
Common Issues
Restart the server after installing BepInEx, as required files need to be generated. The same concept applies to the client but only needs to be launched once from Steam. Afterward, you should be able to find the plugins directory!
In many cases, this happens when not completing all the required steps to install the mods properly in Valheim. Whether this happens on the client or server side, make sure to upload the .dll files in the …/BepInEx/plugins directory. Otherwise, the issue will continue to persist.
If you’re encountering any form of problem after installing mods on your Valheim server, then this could be explained by an outdated version or invalid configuration. Double-check that you’ve downloaded the correct and updated mod, then reinstall it to see if that helps. Make sure to remove all files from the mod, including the config file beforehand.
If you or other players cannot join the Valheim BepInEx server, then make sure you’ve successfully installed the mods on your client. Whether you use an external launcher or the manual method, all modifications need to be on both the server and client side. Afterward, the affected player should be able to connect without further issues.
Useful Links
Valheim Server Guides
BepInEx on GitHub
Thunderstore Valheim Mods
Valheim Plus on Nexus