


Overview
Project Zomboid is a third-person zombie survival game that can be played alone or with others. With a massive map, customizable sandbox, and endless hordes, you will need to loot and craft in order to survive. Use vehicles and tools to flee to safety or to build zombie-resistant fortresses. You will need to be weary of your own character’s health, thirst, hunger, and even depression. With multiplayer servers, you can team up with other survivors or risk being hunted by human enemies. Joining a Project Zomboid server can be confusing for new players, so we have created this Apex Hosting guide to ease you through the setup process.
Locating the Server IP
- Navigate to your Apex Server Panel, then log in.
- Scroll down to the
IP Address:Portsection.
- Copy the connection information to the right of it.
Once you have the IP and port, you are ready to proceed to the next steps!
Joining Through Steam
- Within Steam, navigate to
Viewat the top, then selectServers. - Press
Add a Serverin the bottom-right of the window.
- Enter your full IP:Port, then press
Add this Address to Favorites.
- Press
Refreshto check for your server in the list. - Once you are ready, select your server and press
Connect.
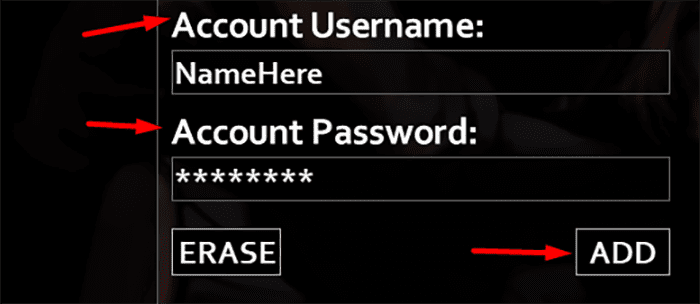
- Once the game launches, select a username and a password to use, then
Connect.
Joining In-Game
- Launch Project Zomboid, then select
Joinfrom the main menu. - Ensure
Favoritesis selected at the top.
- On the right-hand side, enter a nickname for the server.
- In the
IPsection, enter the copied IP address without the 5-digit:Port.
- In the
Portsection enter the 5-digit port at the end of the server address. - Enter a password if required, then select a username and password.
- Press
Addto add the server, then use theRefreshbutton. - Select your added server and select the
Join Serverbutton to connect.
Common Issues
The server doesn’t appear in the Steam server browser:
Oftentimes, if the server does not appear in the Steam server browser, it means that the server is either offline or the IP does not match. Ensure that the IP and port entered is copied as seen on the panel page. Otherwise, restart the server and wait for a few minutes to allow the game to boot up and check again.
The server failed to respond:
This error often occurs when attempting to join a server from in-game that cannot be reached. Check the server information on the right-hand side to make sure everything was correctly entered. In addition, ensure the colon (:) is not included in the IP or port section. If issues still occur, restart the server and allow a few minutes for it to connect. Click refresh on the favorites page to check if it’s online, then connect once again.
The server doesn’t connect when pressing “Join Server”
When this occurs, it is often considered a bug in the game that may prevent you from joining normally. When this occurs, double-click the highlighted server box in the Favorites tab to begin connecting. This will bypass the need for the Join Server button if it is causing issues.


