When self-hosting your own co-op save in Palworld, you might have decided to rent a dedicated server instead. This enables you to have the world active 24/7 without having to keep it running on your computer. The process to actually move your co-op save to the server can be a challenging task for newcomers. Fortunately, it only takes a few minutes! With this in mind, we’ve created this Apex Hosting guide to show you how to migrate your co-op world to dedicated server 👏
1. Find Your Co-op Save Files
⚠️ Click here if you want to only migrate your local save files instead.
- Open Steam, search for “Palworld Dedicated Server”.
- Right-click it, then select
Manage>Browse Local Files.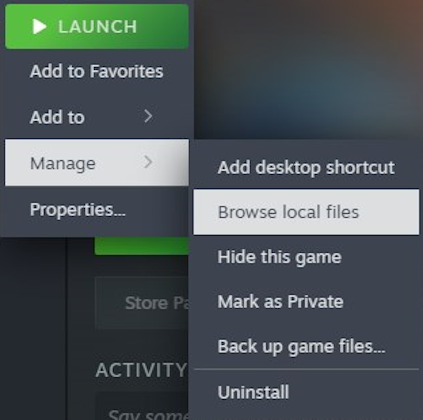
- Navigate to
Pal / Saved / SaveGames / 0in the directory.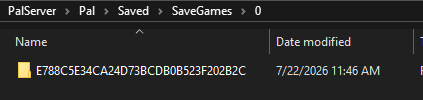
- Keep this open for later use.
2. Upload Co-op Save to Server
- Head towards your Apex server panel and click
Stopat the top. - Navigate to
File Management>FTP File Accesson the left.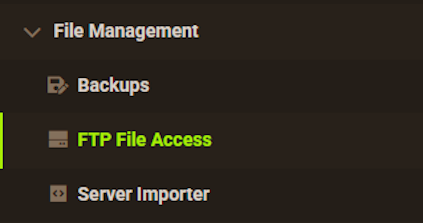
- Create a password or use your existing password to login.
- Navigate to the
Pal/Saved/SaveGames/0directory.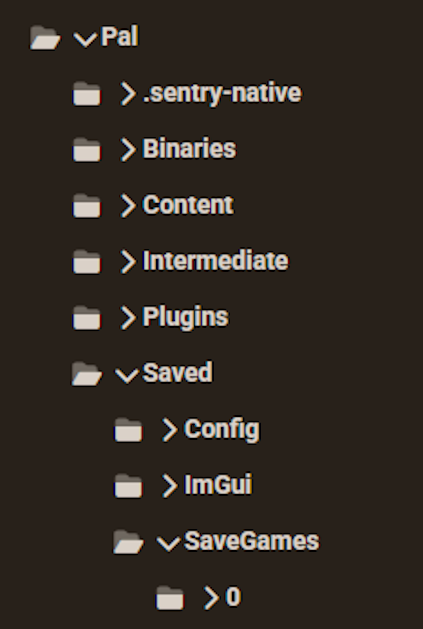
- Drag + drop your co-op save folder in this area.
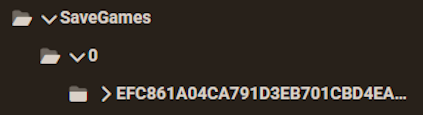
Wait for everything to successfully transfer.
⚠️ If your Palworld save folder is too large, you need to use an FTP Client to upload it.
3. Configure Server Settings
With the files uploaded, you need to tell the server to load that co-op save.
- Make sure the Palworld server is stopped.
- Navigate to
Pal/Saved/Config/LinuxServerfrom the FTP area.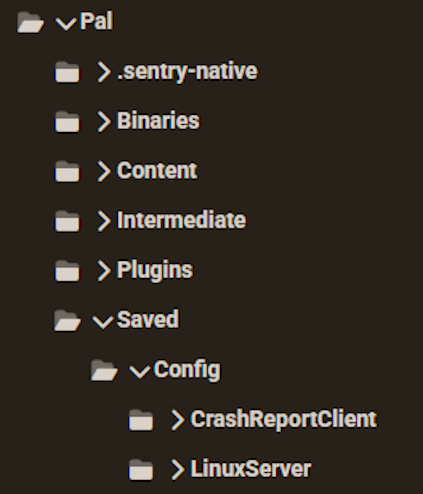
- Locate and double-click the
GameUserSettings.inifile.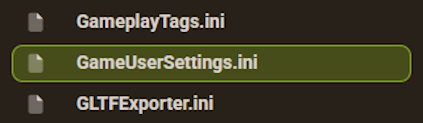
- Copy & paste your co-op save folder name in the
DedicatedServerName=setting.
E.g.
DedicatedServerName=EFC861A04CA791D3EB701CBD4EA1463E - Click
Saveat the bottom, then return to the main panel and start the server.
4. Join Your Palworld Server
Now you need to confirm if this successfully worked by joining the server. When you connect, you should be all set. Double-check that your character is correct, structures are there, and items are stored properly. If all of that is good, then you’ve uploaded your self-hosted co-op save into the dedicated server! 👏
Common Issues
Server Loads a Fresh World
If the server boots up and it’s a brand new save file (no structures, new characters), then the server configuration file cannot find or read your uploaded co-op save folder.
The Fix:
- Stop the server and open the GameUserSettings.ini file.
- Verify that
DedicatedServerName=matches your save folder’s name exactly. - Ensure the save folder was uploaded directly into the
0directory.
File Upload Freezes or Times Out
This happens due to having a large save folder, as Palworld can accumulate a massive amount of tiny files quickly. The standard FTP File Access panel can occasionally freeze or time out due to large file transfers.
The Fix:
- Download an external FTP client like FileZilla or Cyberduck.
- Use your FTP login credentials to log into the client.
- Upload the save folder accordingly via the FTP client.
If you still have any concerns or questions, contact our Support Team for assistance.