Overview
Your Minecraft server can appear dull in-game because of the lack of personalization and customizable features, which leads owners to find plugins for that. For instance, using the TAB to view the connected players does not have any headers or footers by default. Changing that requires a plugin called TitleManager, which allows you to control the player list among other things such as a scoreboard, actionbar messages, announcements, and welcome title messages. Additionally, adding cool effects like text animation and color changes makes your server’s appearance stand out compared to default Minecraft. Welcoming players and giving them useful information about the server or world will make it as professional as Hypixel through the plugin’s abilities. Our Apex Hosting guide will teach you how to install, configure, and use TitleManager to improve your server’s experience!
Modbox Installation
IMPORTANT: Make sure to have Spigot or Paper selected in the Game File option on your server panel so plugins can work properly.
- Head towards your Apex server panel for the server.
- Navigate to
Server Configuration > Modboxon the left.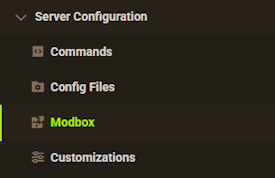
- Choose the version and search for the plugin you want, then select it.
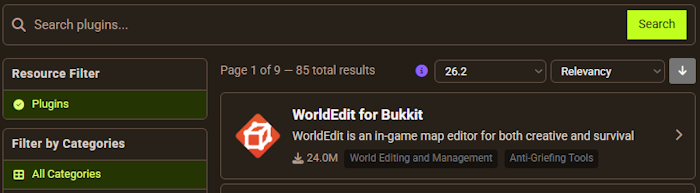
- Click
Installon the left and wait for it to be installed. - Restart the server to load the plugin. Repeat this process for any other plugins.
Manual Installation
Download TitleManager on Bukkit or Spigot and follow these steps:
- Download the plugin file from the link above.
- Head towards your Apex server panel for the server.
- Locate the Game File option, then select Spigot or Paper if you haven't already.
- Navigate to
File Management > FTP File Accessand login. - Drag + drop the .jar file in the
pluginsdirectory. Alternative: Click theUploadbutton and select the file. - Wait for this to finish, then return to the main panel.
- Restart the server and the plugin should load properly once you join.
How to use TitleManager
Most of the usage for the plugin is in the configuration file(s), which is a little confusing at first because of the formatting. However, commands are included in the plugin to send specific announcements and messages in-game rather than using the automatic function in the files. Learning how to use the commands and the formatting of the files are required to begin using TitleManager on your Minecraft server.
Commands
/tm bc [parameters] (message) - Sends a title broadcast message to every player on the server.
/tm abc [parameters] (message) - Sends a title actionbar message to every play in-game.
/tm sb toggle - Enables or disables the scoreboard from the plugin.
/tm reload - Reloads the entire plugin’s configuration, which is good for applying new changes.
You can learn more about commands and parameters on TitleManager’s official command wiki.
Animations
Default text from Minecraft is boring and doesn’t attract attention, but animations make your messages stand out. There are a few options to select from TitleManager, all of them being unique and controlled by you. Setting up animations for your messages in the plugin is difficult, but luckily there is a generator to make that process easier.

How to Use Animations
- Head over to TitleManager’s generator here, then select an
Animation Typeto the left.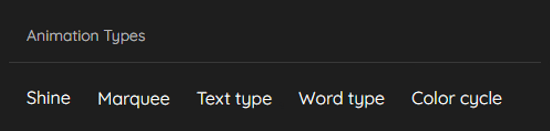
- Once you found the one you want, type your text in the Animation Input field.
- Afterward, you can edit the
Speed (ticks)and other options depending on the animation you selected. - To the right, click
Generatewhen you’re finished designing your animation. - Press
Static Outputand copy the contents, then navigate to your server panel.
- On the left-hand side, click
FTP File Accessand login using your password. - Next, enter into your
pluginsfolder and then clickTitleManager. - Inside of the animations folder, you can press New File in the top left for your animation.
- Name the file accordingly, then paste your generated animation into the file and click
Save.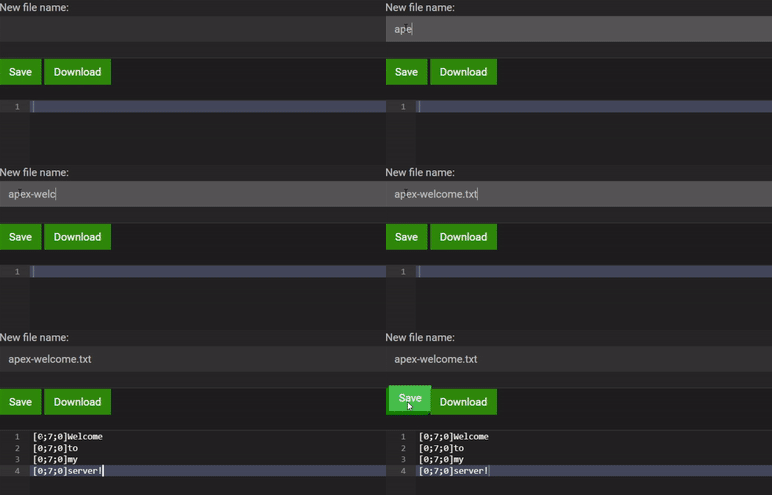
You can now use the animation in the plugin! The filename you created is the animation’s name, which can be used in other configuration files with TitleManager. The format of the animation value once created is ${filename}, so if the file was named “apex-welcome” then the value is ${apex-welcome}. Down below is an example of a default animation.

You can learn more about animations on TitleManager’s official animation wiki.
TitleManager Configuration

Applying any changes to TitleManager requires you to access its configuration file. You use that to implement animations, custom messages, tablist design, scoreboard changes, and other neat features.
- On the server panel to the left-hand side, click
FTP File Accessand login. - Navigate to your
pluginsfolder, then enter into theTitleManagerdirectory. - After that, press
Editto the right of theconfig.ymlfile. - You can now search in the file to locate what features you want to implement or change.
All the features are split up into their respective categories and sections in the file. Down below are the in-game examples of what they look like and where to find them in the file for editing.
Tablist

One of the best features TitleManager offers is controlling the TAB or player list. You can use that to display your server’s name, the world’s time, online players, and other information. Inside of the config.yml file, that’s located in the Player List section, which has a header and footer subsection.
Welcome Title

When a player joins the server, they see this title message. If a brand new player joins, then a similar message appears too. You can begin editing that in the file’s Welcome Title section. As a note, the title and subtitle settings are what controls the message that appears normally to players. Everything under the first-join option is for users that newly joined.
Welcome Actionbar

A player that joins the server for the first time receives this message, and when they join back later on a new message will appear too. This is configurable in the Welcome Actionbar section of the plugin’s file. The title setting is what displays for players and the first-join option is for brand new users.
Scoreboard
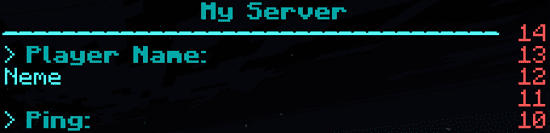
Another wonderful feature from TitleManager is the scoreboard functionality, which can display the player’s username, ping, money, server’s name, and other useful information. You can control that in the Scoreboard section of the file. The title option is the server’s name line, while everything else is the contents of the scoreboard.
Announcements
Just like the Welcome Title, these are title messages that appear in-game but at specific times. They are located in the Announcer section of the config.yml file. It has two styles of announcements, titles and actionbars. You may change them accordingly and add more if you want.
Conclusion
TitleManager allows you to fully customize your Minecraft server from all the available options it has. You can edit the tablist, scoreboard, announcements, and welcome messages. All of that is done through the configuration file of the plugin in the FTP panel. If you want to make your server look fancier, then using the animation generator is a wonderful tool for that. You can create new files for animations in the plugin’s folder, then implement them throughout the main config file. This plugin allows you to welcome players in titles with custom messages and animations, actionbar announcements for restarting the server, and other uses. You now know how to use TitleManager and all the unique features it has to offer, so we wish you the best of luck and enjoy your Minecraft experience!
Useful Links
TitleManager Placeholders
TitleManager Animations
TitleManager Scripts
TitleManager Commands
TitleManager Generator